How to use Seedbucket Remote Agent
Introduction
Seedbucket Remote Agent is a utility developed by Seedboxes.cc that automatically delivers your Seedbucket downloads to your computer, NAS, or server and stores them locally.
Before Remote Agent, this was possible by connecting an FTP or SFTP drive to Seedbucket and using it as the default download location, as described in How to download directly to your NAS with Seedbucket.
Remote Agent makes this process simpler, more secure, and more reliable.
A typical use case is running Seedbucket in the cloud while automatically delivering completed downloads to your home computer, NAS, or server. This lets you benefit from Seedbucket’s remote downloading while still keeping your files stored locally on your own system.
Why use Remote Agent?
With Remote Agent, your downloads are delivered automatically to your local storage without requiring you to expose your NAS or server to the internet.
It has several important advantages over the FTP/SFTP method:
- No open ports required – The agent connects securely to Seedbucket over standard
HTTPS, so you do not need to configure port forwarding on your router or NAS. - Simpler and more secure setup – Since the connection is initiated by the agent, setup is easier and works well even in home network environments.
- Faster and more reliable transfers – The agent supports multi-segment downloads and resumable transfers, helping downloads continue from where they stopped if something interrupts the connection.
- Offline tolerance – If the agent is temporarily offline, delivery does not immediately fail. Seedbucket will wait for the agent to come back online and continue the transfer.
- Automatic local delivery – Your files are transferred directly to your selected local downloads folder, so they are ready on your own system without extra manual steps.
Installing the agent
First, install the agent on the machine, NAS, or server where you want your downloads to be delivered.
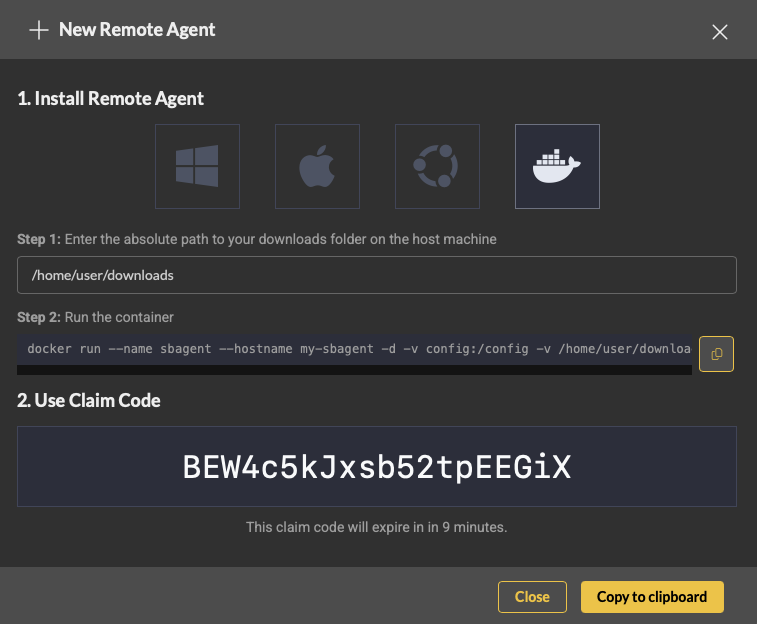
We currently provide installers for Windows, macOS, and Ubuntu. We also provide a Docker image for server installations. Installation is straightforward; just follow these steps:
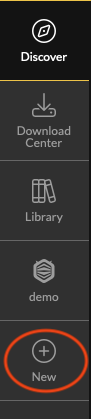
1) Go to your Seedbucket app.
2) On the main sidebar on the left, click "New".
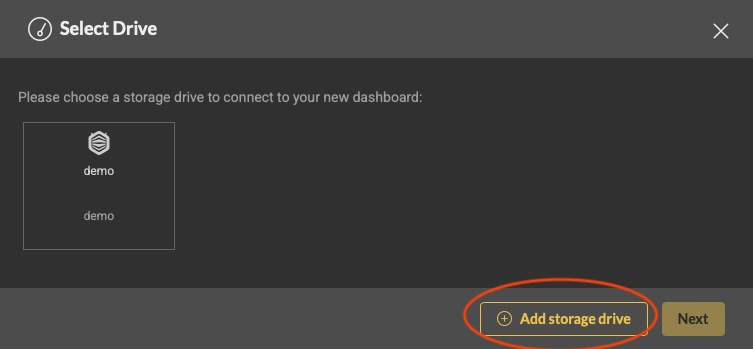
3) Click the Add storage drive button.
4) Select Remote Agent and click Next.
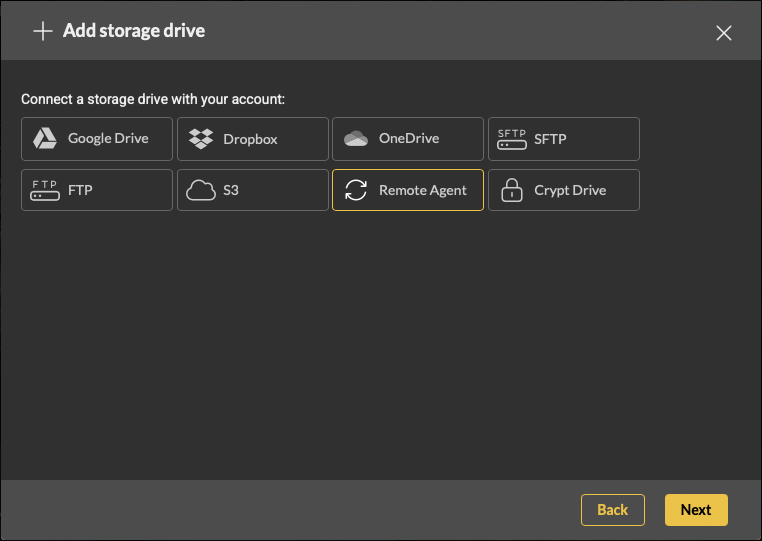
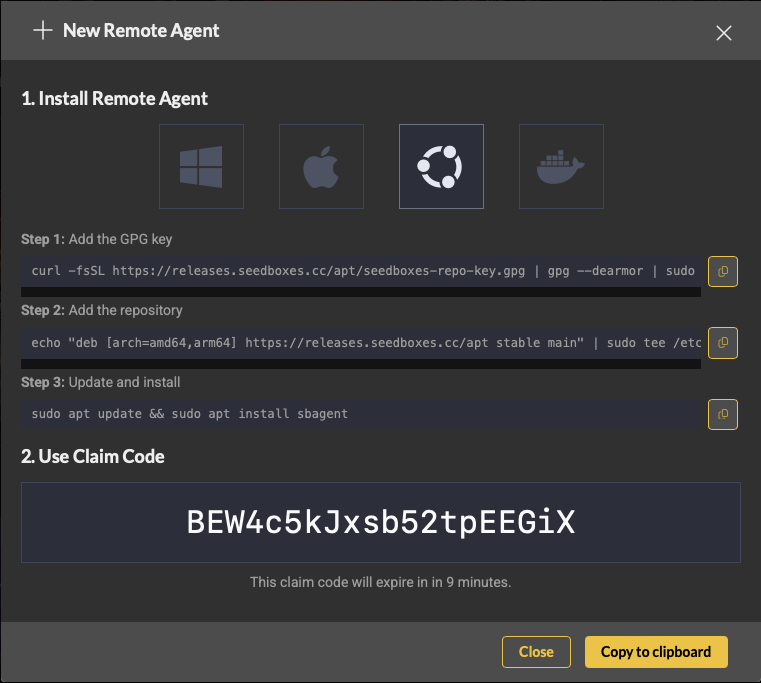
5) A modal will appear where you can select the platform on which you want to install the agent. Windows and macOS will immediately start downloading the installer. Ubuntu and Docker will show additional instructions that you need to follow to complete the installation.
Registering the agent
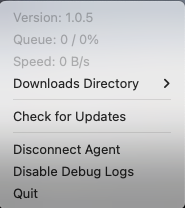
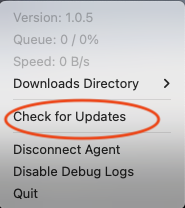
1) After installing the agent, you need to register it with Seedbucket. This step is not required for the Docker image, because the claim code is already included in the command used to run it. On other platforms, start the agent and a Seedbucket tray icon will appear.
![]()
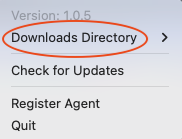
2) The first thing you need to set up is your Downloads directory. This is the base directory where all downloads are stored. The agent can access this folder and everything inside it, but it cannot access locations outside it. Click the tray icon and select Downloads Directory. From here you can set your default downloads directory or quickly visit it by clicking the Go to downloads directory menu item.
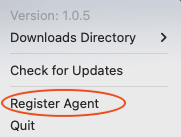
3) Next, we need to register the agent with Seedbucket. Click the tray icon again and select Register.
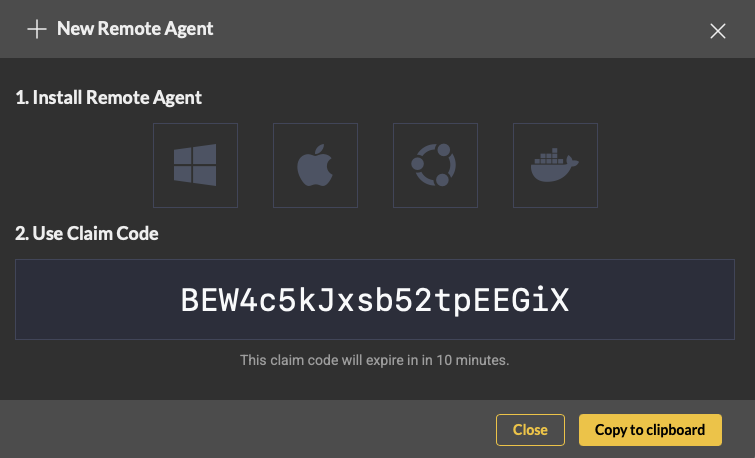
4) After you click Register, you will automatically be redirected to your Seedbucket app. The Remote Agent claim modal will appear, and the agent will prompt you to enter your claim code. Click Copy to clipboard to copy the claim code.
5) Paste the claim code in the input prompt of your agent and click OK.

6) Wait a few seconds and you should see a success message in your Seedbucket app indicating that the agent was registered successfully. If you click the agent's tray icon again, it should show that the agent is registered. You should also see stats and additional menu options, such as Disconnect Agent.
Using the agent
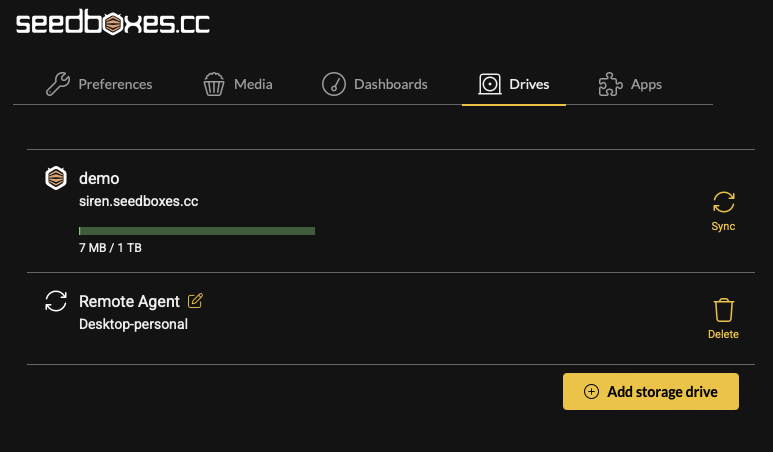
After installation completes, you should be able to see the Remote Agent in your App Settings > Drives as well. Although you cannot create a Dashboard with the Remote Agent yet, it can still be used like any other storage drive in Seedbucket.
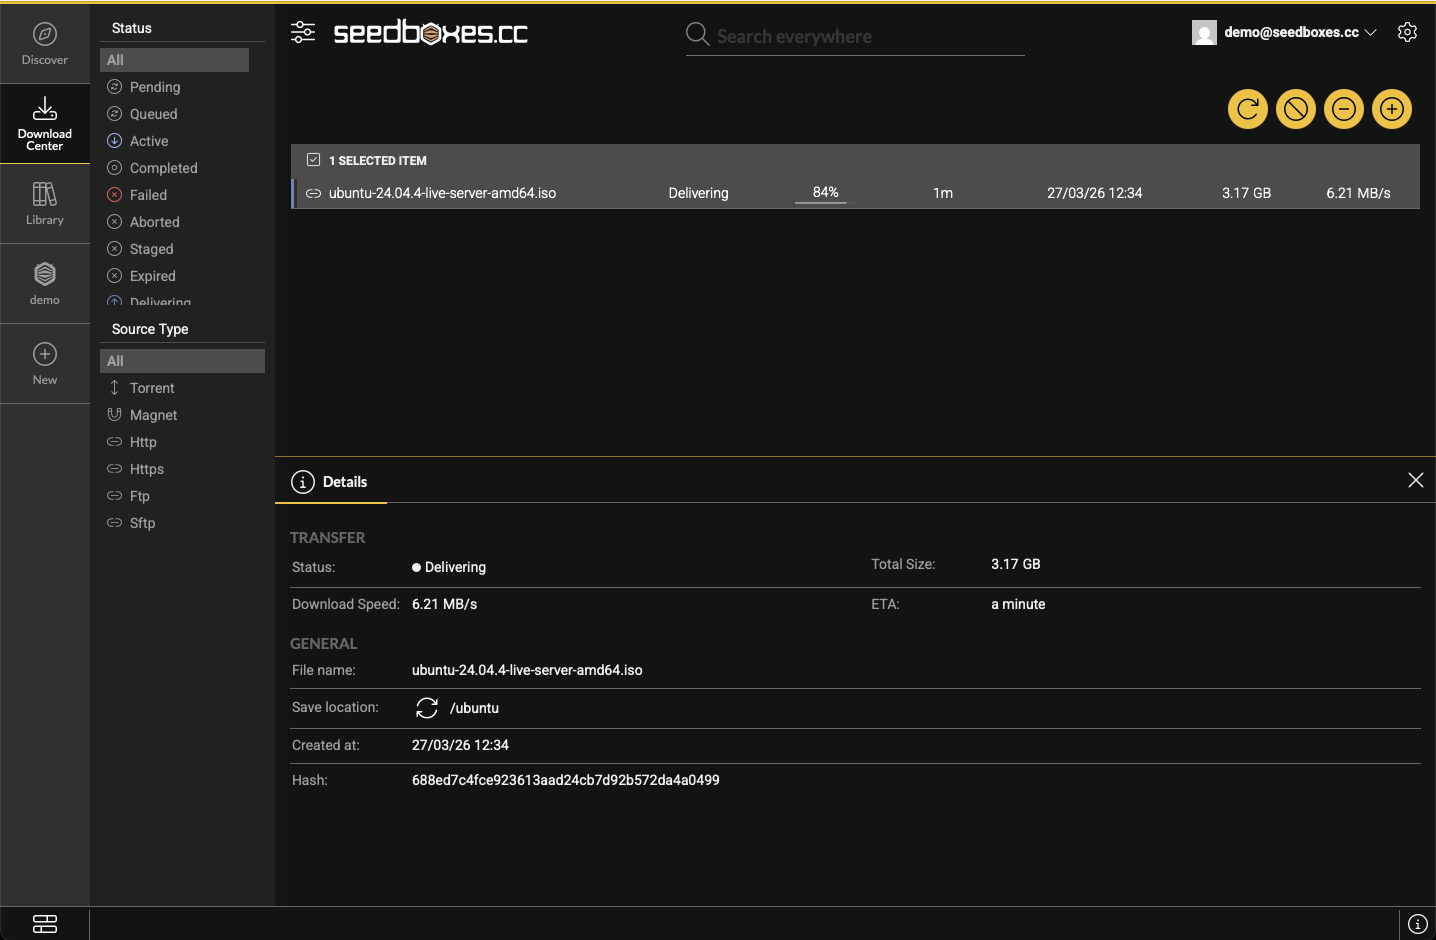
1) Go to your Download Center.
2) Click the + button from the upper right corner in order to add a new download. The Download modal appears.
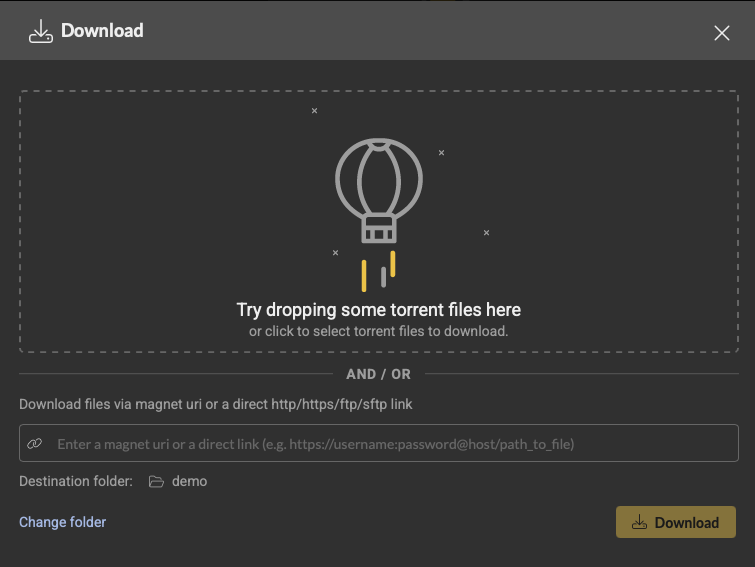
3) Click the Change folder button to select a folder from your Remote Agent. The Remote Agent should be in the dropdown list. Select it and then choose the destination folder. For our example, we will use the ubuntu folder which already exists in our demo agent's download folder. Click Select and the modal will close.

4) The Remote Agent destination folder is now selected. Enter an HTTP download link and click Download.
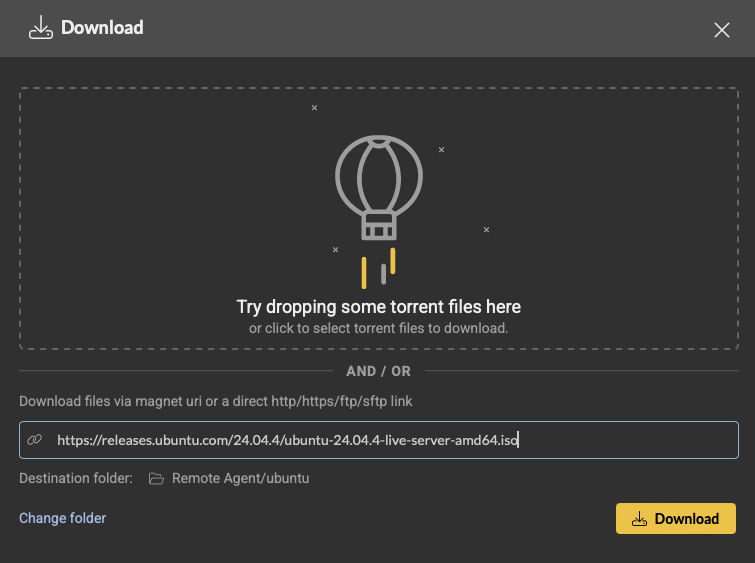
5) The download will appear in the download list just like any other download. Once the download has completed on our servers, its status will change to Delivering, which means the files are being sent to your Remote Agent.
If the agent is temporarily offline, the status will change to Staged. The files will remain available for some time to allow the agent to reconnect, after which delivery will continue automatically.
If you are using the desktop version of Remote Agent, clicking the tray icon will also show live transfer stats.
Auto-updater
Remote Agent supports auto-updating. It automatically checks once per day for updates and prompts you if one is available. You can also manually check for updates by clicking Check for Updates from the agent's tray icon menu.
IMPORTANT NOTE: The Docker image will automatically update whenever an update is available.